How to paint
Your Home Interior's

Nothing in the world breathes life into your home like a fresh coat of Jewell Paint. Use this step-by-step guidance and our range of Jewell Interior paints and primers to achieve beautiful, long-lasting, professional-quality results.

STEP 1 - Choosing the right paint

While any paint can give a home a quick facelift, a premium paint can truly transform a home’s interior and make it last. A premium paint offers a smoother, more uniform appearance, as well as much better coverage, than an economy paint. Because a home is a major investment, premium paint provides the long-term protection it deserves. Consider using Jewell premium interior latex paints for superior stain resistance and washability, excellent hide and block resistance, and low odor.

Selecting the Right Gloss

The gloss level you choose for your paint project can have a significant impact on both appearance and maintenance. A color in higher gloss paint will appear brighter and richer than the same color in a lower gloss. Also, higher glosses will have better washability and stain resistance, though they may also highlight defects and imperfections on a surface.

Soft Glo

Soft Glo – paints are a good choice for adult bedrooms, living or dining rooms, and ceilings. For these areas, we recommend Jewell Maskk Soft Glo Paint.

 Pearl Glo – paints can be used for high traffic areas such as hall ways, living rooms, drawing room or bedrooms. Consider using Jewell Attitude Pearl Glo for such areas.

 Semi Glo & Dazzle Glo – paints are ideal for kitchens, bathrooms, family rooms, children’s bedrooms, utility areas, woodwork, doors and trim. We recommend Jewell Big & Bright Semi Glo & Attitude Dazzle Glo Paint for such areas.

STEP 2 - Estimating the correct amount of paint

You can get a fairly accurate idea of how much paint you’ll need for your project using these simple calculations.
First, measure the dimensions of the wall (Wall A) & multiply by the number of walls with those dimensions:

Wall A: Length: __ x Height __  x No. of Walls __ = Total sq. ft.: __ 

If you are painting walls of different sizes, measure the next wall (Wall B) and multiply by the number of walls
with those dimensions:

Wall B: Length: __ x Height __  x No. of Walls __ = Total sq. ft.: __ 

Next, add the total square footage of all walls and subtract the area for doors (about 21 sq. ft each) and windows (about 15 sq. ft each):

Total Walls (A&B) sq.ft: -__ Doors & Windows  __ = Total sq.ft.: __ 

To determine the number of gallons for one coat coverage, divide total square feet by 400 square feet approximate
coverage for one gallon). Consider buying enough for two finish coats for the truest color and best coverage.

Total sq. ft.:__ ÷ 400 = Gallons needed for one coat: __

STEP 3 - Buying the right tools & supplies

We’ve created this simple checklist of the tools you should have for your interior project

STEP 4 - Room painting basics

It’s true that paint is the easiest and fastest way to give your rooms a facelift, but it’s still an investment of time and money. That’s why you want to be sure to do it right-and doing it right includes taking a little extra time up front to prepare surfaces properly.

No matter how expensive the paint, it won’t hide existing surface flaws. Ensure that your surface is smooth, clean, and ready for paint. Choose the right primer.

Remember that primer isn’t simply diluted paint-it’s like double-sided adhesive tape. It bonds to the existing surface and in turn “grabs” the paint and ensures good adhesion. For best results always choose a primer of the same brand as the paint you select.

Tinting the primer can give you a headstart on getting good color coverage and is recommended if you’re working with dark colors. Dark colors needs three to four coats, even with a primer.

Complete wall preparation

No amount of paint, no matter how high its quality, will cover flaws in the wall beneath or adhere well to dirty walls.
Thus, proper preparation, whether for a single coat of paint or decorative paint finish, is the most important step of any painting project. (Before painting, mark any marred wall areas with a soft-lead pencil so you don’t overlook needed repairs).

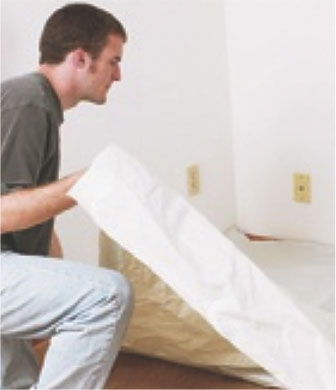
1. COVER AREA WITH DROP CLOTHES

Move furniture away from walls and protect floor and baseboards with 12-inch baseboard masking and a paper/poly drop cloth.

2. REPAIR SMALL CRACKS AND HOLES

Set popped nails or screws, repair cracks and holes, and fill dents with lightweight crack filler.

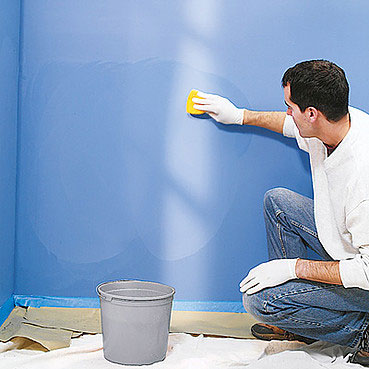
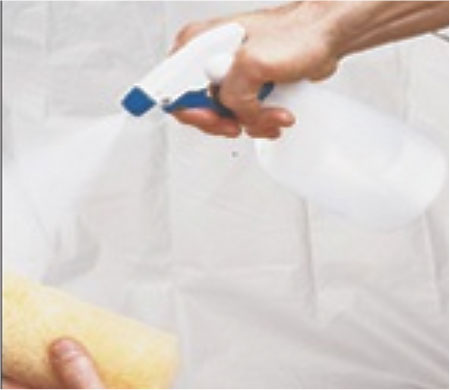
3. REMOVE STAINS AND MILDEW

Treat any areas of mildew with a 3-to-1 water/bleach solution. Mix three parts water to one part bleach in a plastic bucket. Apply liberally with a sponge. Apply again after 20 minutes. Rinse thoroughly with clean, fresh water. If you are sensitive to bleach, protect your hands and eyes.

4. SAND WITH A SANDING BLOCK

Let the crack filler dry according to the manufacturer’s instructions, then sand the wall using a sanding block with 220-grit sandpaper.

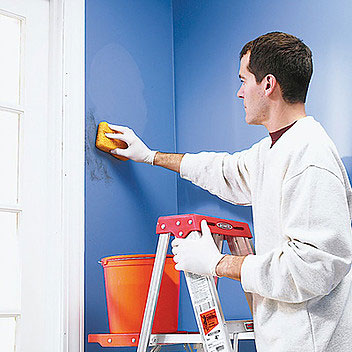
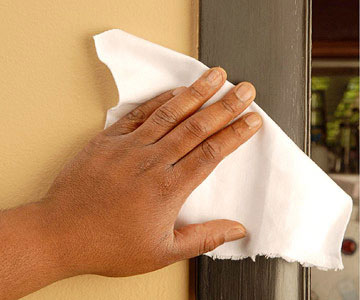
5. CLEAN THE WALLS Clean

with a Trisodium phosphate (TSP), a nonsudsing soap that is 100% phosphate, is the most powerful cleaner you can buy. Otherwise, use a TSP substitute, which does not need rinsing. Let the wall dry overnight.

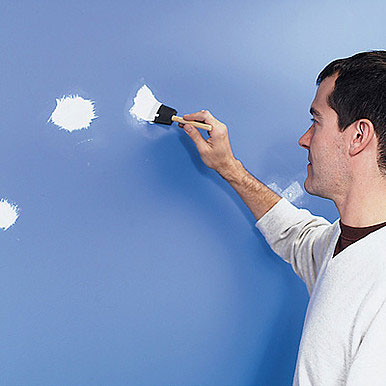
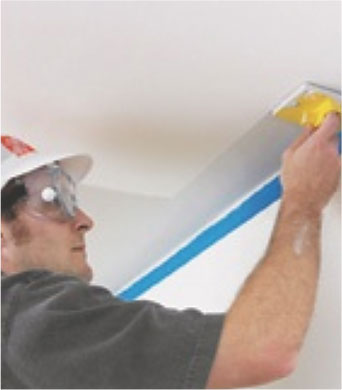
6. SPOT-PRIME REPAIRED AREAS

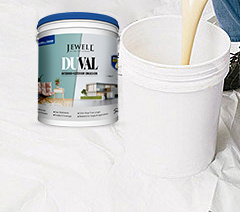
Spot-prime all of the repaired areas with Jewell Interior waterborne primer. If stains are still bleeding through, use Jewell oil-based white primer

Removing Gloss

It’s almost impossible for paint to adhere to a glossy surface, because a glossy surface lacks what painters call “tooth”, or roughness, which gives the paint something to stick to.

To detect gloss, use a bright light with a reflector to shield your eyes. It doesn’t take much to create tooth-a light sanding or use of a chemical deglosser will do the trick. When the surface ceases to be reflective, it’s ready to paint.

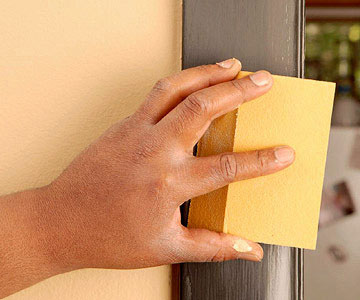
1. SAND LIGHTLY UNTIL SMOOTH

Fill gaps in trim and baseboard with paintable caulk, then sand lightly with 220-grit sandpaper. Use a sanding block for flat surfaces, a brass-wire brush for fluted surfaces.

2. REMOVE DUST WITH A TACK CLOTH

Remove the sanding or brushing residue with a tack cloth so the surface is smooth and clean.

STEP 5 - Choosing the right tools

Choosing the right paint brush

Brush selection, use and care are as critical to your success at painting as surface preparation. A good paint brush feels like a natural extension of your hand. Brushes come in various qualities and prices.

Quality speaks. Bristle brushes are more expensive. They have earned their popularity with their variety of uses, ease of cleaning & reuse capabilities. There are two types of bristles:

Using brushes

Achieve stunning results by knowing some key points, how to properly use a high-quality paintbrush.

Selecting the right roller nap

Use a roller cover with a long nap for rough surfaces, a short nap for smooth surfaces.

A roller nap is the fiber that applies the paint. Select a roller nap designed for the texture of the wall you plan to paint and the type of paint you plan to use. As with many things in life, you get what you pay for. A cheap roller has a cardboard core that quickly goes out of round and a nap that will soon come off on the surface. It costs a little more to get a roller with a fiber core and well-attached nap, but it’s easy to clean and will last through several jobs.

Most naps are nylon, good for both latex and alkyd paint. Lamb’s wool rollers are excellent for applying alkyd paint, but they tend to soften in water-based paints and are expensive. Common nap lengths vary from 3/16 inch to 1¼ inches. The longer the nap fiber, the rougher the surface it will cover. Short naps apply a smoother coat of paint and are recommended for dark colors.

Selecting the right roller nap

Using a paint roller

FOR SPEED, EFFICIENCY, AND EVEN COVERAGE ON A LARGE SPACE, USE A PAINT ROLLER.

1. LIGHTLY DAMPEN THE ROLLER

Prime the roller cover with a misting bottle filled with water (latex or acrylic) or a rag doused in mineral spirits (alkyd) before starting. Remove excess liquid, or the first application will run.

2. DIP THE ROLLER INTO PAINT

Dip the roller cover into the tray and saturate it with paint. Then remove excess paint by gently rolling it back and forth on the grated part of the paint tray.


3. PAINT A “W” PATTERN

Start at a corner and roll on an 18×18 inch W pattern. If the paint drips, start with an upstroke, making an M.

4. FILL IN WITH PAINT

Fill in the W without lifting the roller. Continue down and across, bleeding sections together. Keep the roller wet with paint.

5. BACK-ROLL TO SMOOTH FINISH

After you finish a 3-foot-wide section, reload the roller lightly and back-roll from floor to ceiling. This smooths out the finish and removes lap marks, drips, and bare spots. Do not back-roll if the paint has already begun to dry or you’ll simply pull the paint off the wall.

STEP 6 - Priming is essential

Priming helps ensure a professional-looking paint job. It isn’t just a way to sell you one more paint product, and isn’t just watered-down paint. Primer is a specially formulated product designed to:

PRIMED FOR SUCCESS:

Priming involves the same steps as painting the finish coat on the wall. To prepare all surfaces for priming, first repair and clean them. Cover all surfaces you do not plan to paint; primer can be as difficult to remove as paint. And it spatters just as much! Primers have different windows of time that they retain tooth for good adhesion, from 24 hours to 30 days. Check the label on the can to determine whether you need to apply the finish paint within a day or two of priming.

WHY USE BOTH PAINT AND PRIMER?:

Paint and primer perform two distinct and important functions, and to get a good job you can’t use one without the other. Primer provides bonding and blocking. Paint provides durability and color.

THE TAPE TEST:

If the wall has been previously painted with latex, if there has been no patching, and if the paint is clean and adhering well, you may be able to consider the old paint to be the primer for the new. HERE IS A TEST: Press a piece of transparent tape onto the old paint, and then remove it. If the old paint comes off with the tape, you need to prime.

PRIMING THE WALL IS THE FINAL STEP BEFORE YOU ACTUALLY PAINT IT.

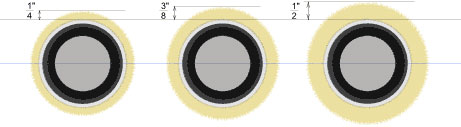
1. TINT PRIMER FOR BEST RESULTS

Most primers can be tinted, and tinting will ensure good coverage for the finish coat. But too much tint will dilute the primer and reduce its efficiency. Usually a primer can be tinted by no more than 25% of the formula for the color you’ve chosen.

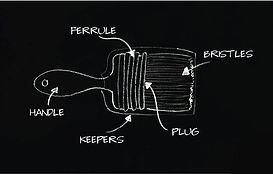
2. SPRAY ROLLER OR BRUSH

Dampen your roller or brush to get off to a fast start. Use water for acrylic, paint thinner for alkyd.
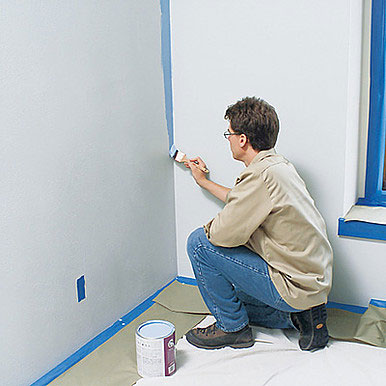
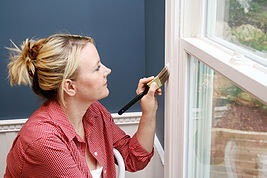
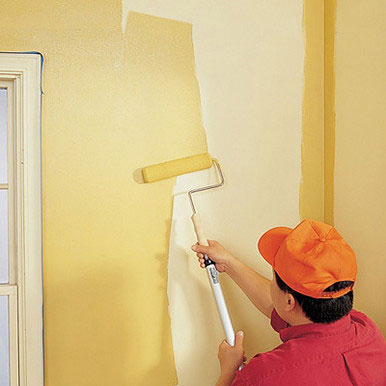
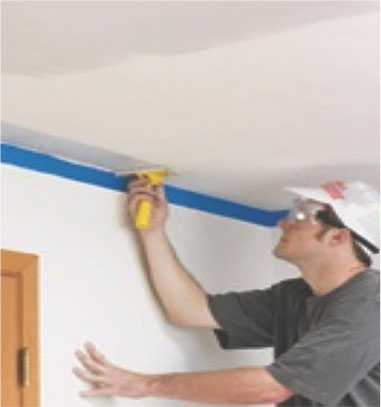
3. CUT IN CORNERS

Pick your starting point and cut in the corner with a 2-inch sash brush or a corner pad. Cut in the first 3 to 4 feet along the ceiling too.
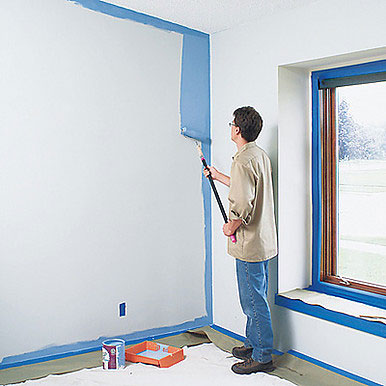
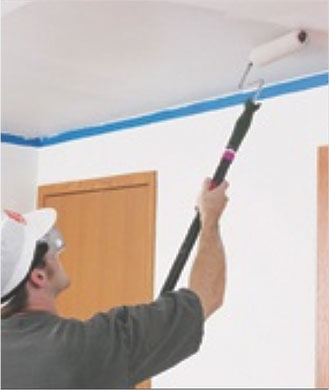
4. ROLL ON PRIMER

Apply the primer using a 9-inch roller with the appropriate nap. Start with a single vertical strip at the cut-in corner.

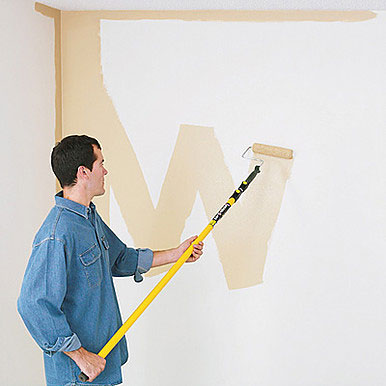
5. PAINT A W-PATTERN

Roll the remaining wall in 3x3 foot sections, working from top to bottom. Lay the primer down in a W, then fill in the gaps without lifting the roller.

STEP 7 - Painting Ceilings

Ceilings are as easy to paint as the walls. Just do the necessary preparation work and use the right tools. Painting a ceiling? Invest in an extension pole, safety goggles, and a painter’s cap. And use Jewell Maskk Soft Glo Paint. It comes in a variety of colors, all specially formulated to:

Prepare the ceiling before painting. Dust and grime accumulate, making it virtually impossible for paint to adhere. Mildew and water stains will bleed through even the best of paint. Cracks, mars, and dents are more visible in the artificial light that generally reflects off ceilings. Keys to superior ceiling results are careful, thorough preparation, priming, and the use of a quality paint. Add color. The ceiling can be important part of your color palette. For instance, if you want to bring the ceiling “down” for a cozier room, paint it a darker color. For a light, airy feeling, paint the ceiling a very pale blue.

1. REMOVE OR COVER FIXTURES

Remove or bag the ceiling fixtures. Removal of the ceiling fixtures will make for a neater job, but you can also drop the cover plates and wrap the fixtures in plastic bags.


2. MASK OFF THE WALL

Mask off the tops of the walls with 2-inch blue painter’s tape. One-inch tape would allow the roller to strike the wall.


3. PROTECT AREA WITH DROP CLOTHS

Cover the floor by overlapping drop cloths by at least 12 inches. Protect windows, doors, and trim, if necessary.


4. DAMPEN THE ROLLER

Prime the roller cover by spraying it with a misting bottle until it is just damp. Remove excess water before you begin painting.


5. CUT IN THE CORNER

To start, cut in one corner of the ceiling with a paint pad. Cut in only as much as you can roll out before the paint dries.


6. ROLL ALONG THE WET EDGE TO BLEND AREAS

Begin rolling over the still-wet cut-in strip. Keeping a wet edge prevents overlap marks in the finished ceiling. Load the roller regularly and roll slowly. Back-roll to blend the paint.


7. WORK IN MANAGEABLE SECTIONS

Work in sections to keep wet edges. Cut in with a pad or brush, apply paint with a roller, then roll out applied paint to blend the two areas.


8. VARY THE DIRECTION OF THE ROLLER

Slightly vary the direction of your rolling. Perfectly straight rolling is more likely to show overlap marks.


9. CONTINUE UNTIL THE SECTION IS DONE

Continue applying paint, rolling out, and blending until the first cut-in section is finished.


10. START ON THE NEXT SECTION

Begin the next section by cutting in the wall/ceiling joint.


11. REPEAT THE PROCESS

Apply paint, roll out, and blend with the cut-in edge and the previous section.


BETTER RESULTS: Roll in the direction of the shorter room dimension to minimize the drying time between passes. This gives you time to feather the wet paint, avoiding overlap marks.

USE THE RIGHT ROLLER FOR TEXTURED OR ROUGH CEILINGS: Textured or roughed ceilings require special rollers that will allow the paint to fill in properly. Depending upon the thickness of the texture, use a rough-surface or split-foam roller.


STEP 8 - Painting walls

The basics of painting are easy to learn, and putting them into practice will make every painting job easier and faster! Changing the color scheme in a room is the fastest and least expensive decorating touch on the market. Jewell wall paints are formulated to:

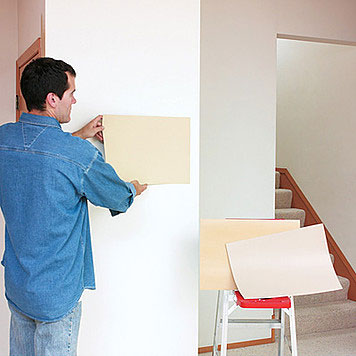
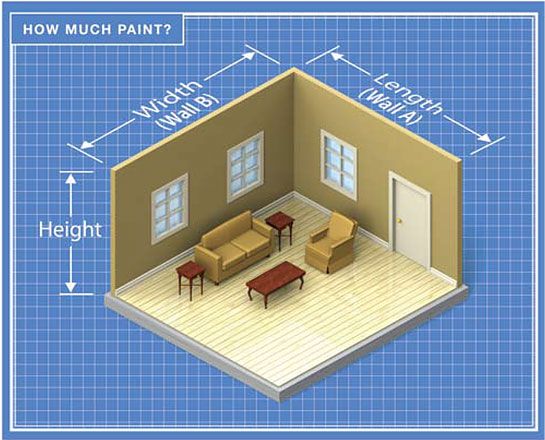
1. PAINT TEST PANELS TO FIND THE RIGHT COLOR

Before finalizing your wall color choice, paint test panels with colors you are considering. Compare candidate colors under all the lighting conditions you will find in the room over the course of a full day and evening.

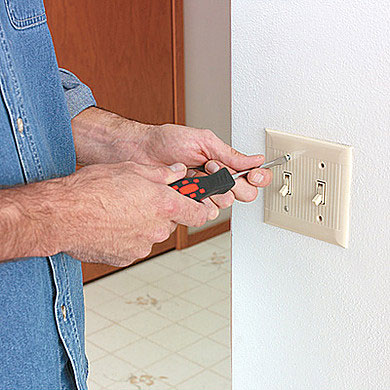
2. REMOVE THE COVER PLATES

Remove all of the electrical cover plates on the wall. Reinstall the screws in the outlet box to avoid misplacing them.

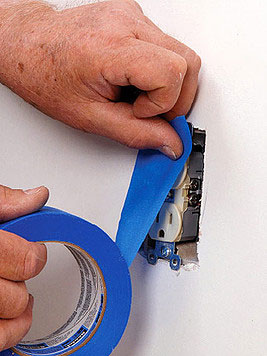
3. COVER RECEPTACLES WITH PAINTER’S TAPE

Pull off dimmer knobs. Cover the switches and receptacles with masking tape.

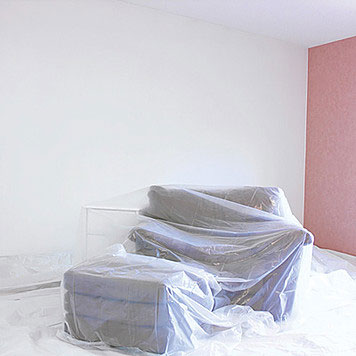
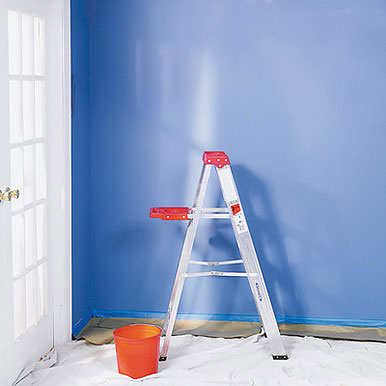
4. REMOVE OR COVER FURNITURE

Remove all of the furniture or group it in the center of the room. Protect it from spatters with plastic or a drop cloth.

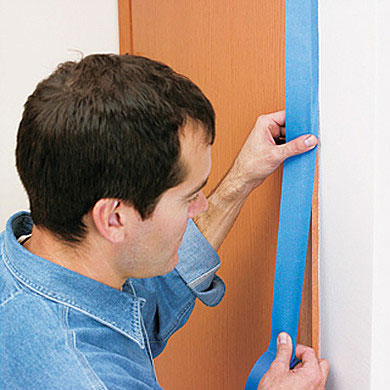
5. PROTECT SURFACES FROM PAINT

Mask any surfaces not to be painted, such as door & windows casings, with blue painter’s tape.

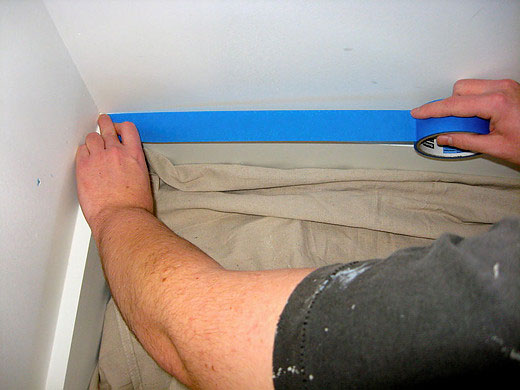
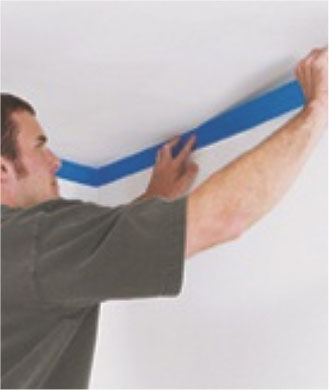
6. PROTECT THE BASEBOARDS

Mask off the baseboards with 12-inch baseboard masking, overlapping the floor drop cloth. (Clean the baseboards before taping to ensure good adhesion).

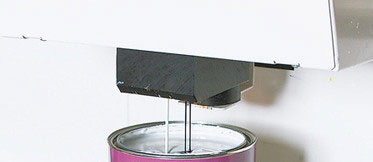
7. MIX ENOUGH PAINT TO COMPLETE THE ENTIRE JOB

Box the paint (mix the contents of all the containers for consistency) in a 5 gallon bucket and stir.

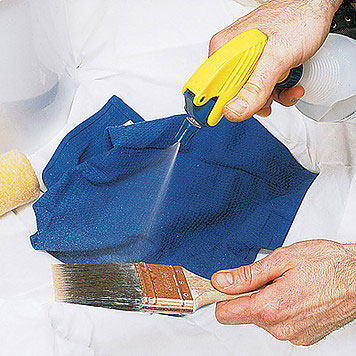
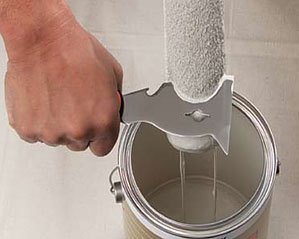
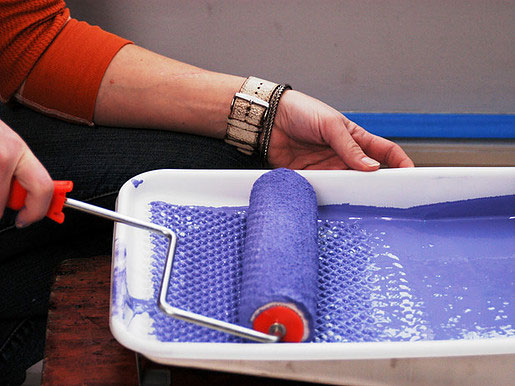
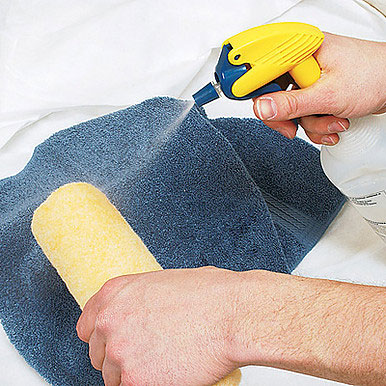
8. DAMPEN THE ROLLER AND PAINTBRUSH

Prime the roller cover and cutting-in brush by wetting with a misting bottle. Remove excess water before applying paint.

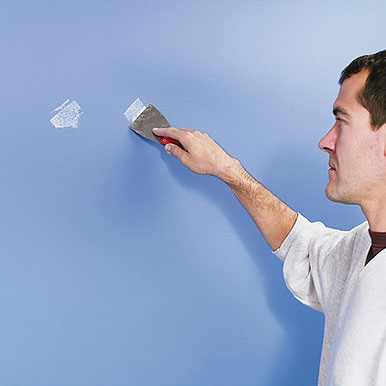
9. CUT IN AT THE CORNER

Start by cutting in a corner with the brush. Cut in only as far as your arm will reach to make sure you keep a wet edge when you roll on the paint.

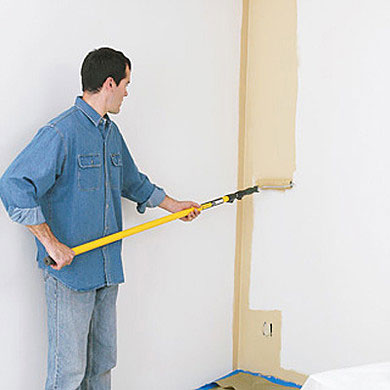
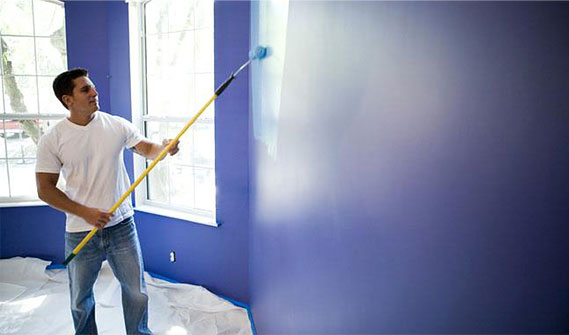
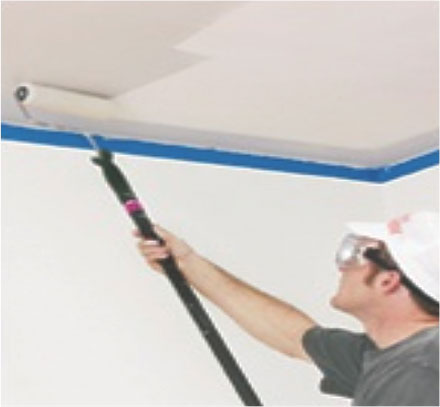
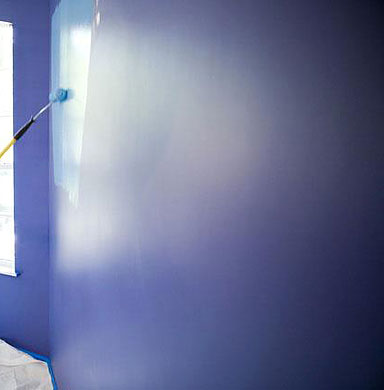
10. ROLL OUT FROM THE WET EDGE

Begin rolling by applying a vertical strip that overlaps the cut-in strip.

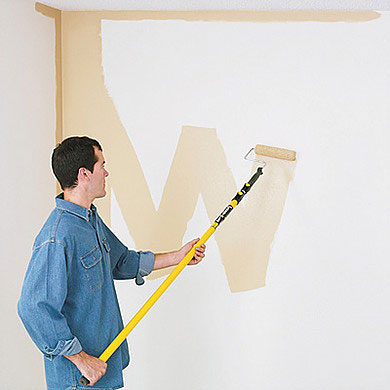
11. PAINT A “W” PATTERN

Roll paint in a W pattern, and then spread the paint to fill in the pattern. Work in small sections so the paint doesn’t begin to dry before you can fill in the section.

12. BACK-ROLL TO BLEND THE SECTION

Roll paint in a W pattern, and then spread the paint to fill in the pattern. Work in small sections so the paint doesn't begin to dry before you can fill in the section.

13. MASK OFF WALL TO PAINT TRIM

Give the wall paint a minimum of 24 hours to cure, then mask with blue painter’s tape.

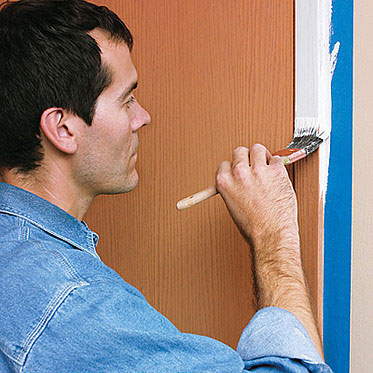
14. PAINT THE TRIM IF DESIRED

Don’t puddle paint against the tape, however, or you’ll pull of paint along with the tape when you remove it. Remove the tape immediately by pulling it down and away from the wall.

STEP 9 - Cleaning up and Properly Disposing of Your paint

Water-based paints make cleaning up fast and easy. Clean any spills with a damp cloth before they dry. Clean brushes, rollers and other tools with soap and water.

PLEASE THINK ABOUT OUR ENVIRONMENT

NEVER POUR LEFTOVER PAINT DOWN A DRAIN OR INTO A STORM SEWER.

Preventative steps

STEP 10 - Caring for your newly painted walls

Use a light touch

Rinsing

Residual stains

Indigo Breeze-BL 0678

Carbon Flint-J1423

Ink Grey-GA 6032

Smoke Grey-J1422

Blue Horizon-GA 6033

Grand Bay-GA 6034

WATER’S EDGE-J1421

Clear Sky-GA 6035

Mirage White-J1420

Thunder Cloud-GA 6026

Blue Lake-GA 6027

Granite-GA 6003

Voltage-GA 6028

Brook View-GA 6029

Bali Blue-GA 6030

Sensibility-GA 6031

Cool Crystal GA 6009

Raw Jute-WH 0143

Cream Pie-WH 0144

White Cameo-J1025

Sonnet-WH 0139

Harmony-J1024

Blossom Tint-WH 0140

South Pole-J1023

Mica Matte-WH 0136

Rain Drop-WH 0137

Love Song-WH 0138

Soft Glow-WH 0113

Snow Blush-J1022

Swan Wing-WH 0114

Milky Way-J1008

Pearl Star-WH 0115

Cotton Wool-WH 0116